Request Response Cycle and Creating routes In Express JS
Hey there fellas! How are we doing today! I hope you guys are well, because I am very excited to step up our journey of being an Express JS developer!
Before we dive into today's topic, I would request you to read the previous blog in the Express series where we talked about the basics of express, check it out here.
Alright then, let's begin!!
In this Article
- What are Request-Response Cycles?
- How does express handles req-res cycles?
- About Middleware
- Creating an API demonstrating above topics
Request-Response Cycles
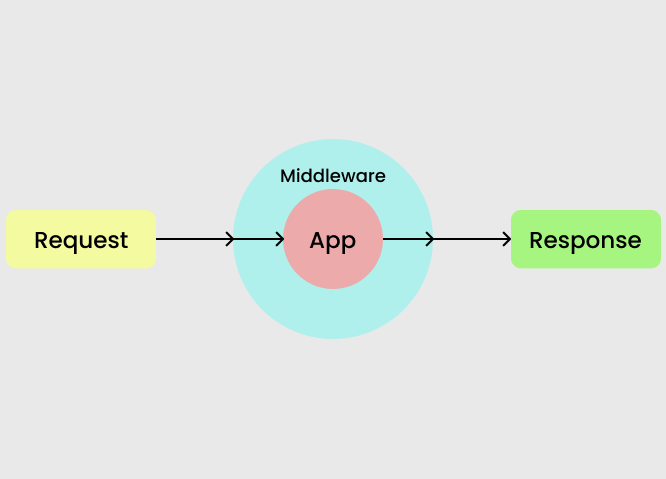
For the remaining parts of this article, I will refer to request-response cycles as req-res.
So what are these req-res cycles? Remember when you go to a shop to buy something? What happens there?
- You ask the shopkeeper for something you need
- The shopkeeper then searches for the asked resource/item in the storage
- And lastly if it's available you get it and you leave.
A similar thing happens with express, but with much more stuff happening under-the-hood! Let's understand this more clearly in a step-by-step way:
- Whenever you need something from a source over the internet, you make a request to an API or Application Programming Interface.
- What is an API? It is a way/process by which 2 or more computer programs can interact with each other or share resources.
- After you make the request, the server receives it and starts processing it.
- Processing the request may include getting some data, posting some data or deleting some data.
- Upon the successful processing of the request on the server side, a response object is created and is then sent back.
- This response object contains our requested resource and some other important information.
Let's make our own API
Before we start developing our very own custom API, there are a few terms I would like to introduce:
- API Endpoints: These are the specific locations within an API that perform req-res cycles independent of the others.
- HTTP Methods: These are the request methods available for our use. Each HTTP Method serves a different purpose, w will learn about them as we use each one of them.
- Route Handler: This is a function that is called when we hit a specific API endpoint with the mentioned HTTP method.
Now that we are aware of the common terms, let's get to it. Fire up VS Code and let's build our API!
Installing Packages
- Open up the integrated terminal and execute the following commands to create a project directory and move into it.
1mkdir express-series
2cd express-series- Create a package.json file to store details about the project.
1npm init -yThe above command will create a package.json file which will store information about our project's dependencies, different scripts and other basic things.
The "-y" flag ensures that every property is assigned the default value. If you want, you can remove the "-y" flag and add your own values but I will keep it this way only.
- Install express
1npm install express- Install nodemon, this will help us restart the server each time we save the file so we don't have to do it manually.
1npm install --save-dev nodemonThe "--save-dev" flag allows us to install packages as a dev dependency, which means these packages won't be used in production or testing, but only in development.
Setting up the Server
In the root directory, create a file "index.js" and add the starter code for an express server:
1const express = require("express")
2
3// Create the app
4const app = express()
5
6// Define the port
7const port = 3000
8
9// Start the server
10app.listen(port, () => {
11  console.log(`Server running at http://localhost:${port}`)
12})
Now, to start our server, we will create a script, that we only have to run once.
- Remember the nodemon package? We will use it to monitor for changes in our file, and as soon as we save our changes, it will automatically restart the server.
- Head over to the "package.json" file, and under the "scripts" object, add a "dev" script and it's value should be "nodemon index.js".
1// package.json
2{
3  ....
4
5  "scripts": {
6    "test": "echo \"Error: no test specified\" && exit 1",
7    "dev": "nodemon index.js"
8  },
9
10  ....
11}
Now, head over to your terminal and execute "npm run dev" to start your server.

Great! Our server is up and running but it is not ready to handle requests yet, let's tackle that now.
Creating Routes
Express allows request handling with different HTTP verbs like:
- GET: This method is used to pull or read the data form a server or a database.
- POST: This method is used to add or post data to server/database from the client.
- PUT: This method is used to update a resource as a whole, meaning it will affect the entire the resource.
- PATCH: This method is also used to update a resource, but it focuses on specific fields. It will only updated the provided fields and nothing else.
- DELETE: As the name suggests, it is used to delete a resource from the database.
Now that we are familiar with some of the common HTTP methods, let's put them to use in our custom API project!
Let's create a "routes" folder, where we will store our application routes. Inside that folder, we can create a file "routes.js" and start adding our route handlers in it.
1// File: routes/routes.js
2
3const express = require("express");
4
5// Dummy Data
6let items = [
7  { id: 1, name: "Item 1", desc: "This is item 1" },
8  { id: 2, name: "Item 2", desc: "This is item 2" },
9  { id: 3, name: "Item 3", desc: "This is item 3" },
10  { id: 4, name: "Item 4", desc: "This is item 4" },
11];
12
13// Create an instance of the express router
14const router = express.Router();
15
16// our routes go here...
17
18module.exports = router;
19
20
21
In the code above, we just import express into our file so that we could use the router inside of our application. And then we have some dummy data in an "items" array.
GET Route
To get anything from the our database, we will use the GET HTTP method. In your route.js file, add the following code to return a list of all the items in the array.
1...
2// http://localhost:3000/api/get-all
3router.get("/get-all", (req, res) => {
4  try {
5    res.status(200).json({ items });
6  } catch (error) {
7    console.log(error);
8  }
9});
10...
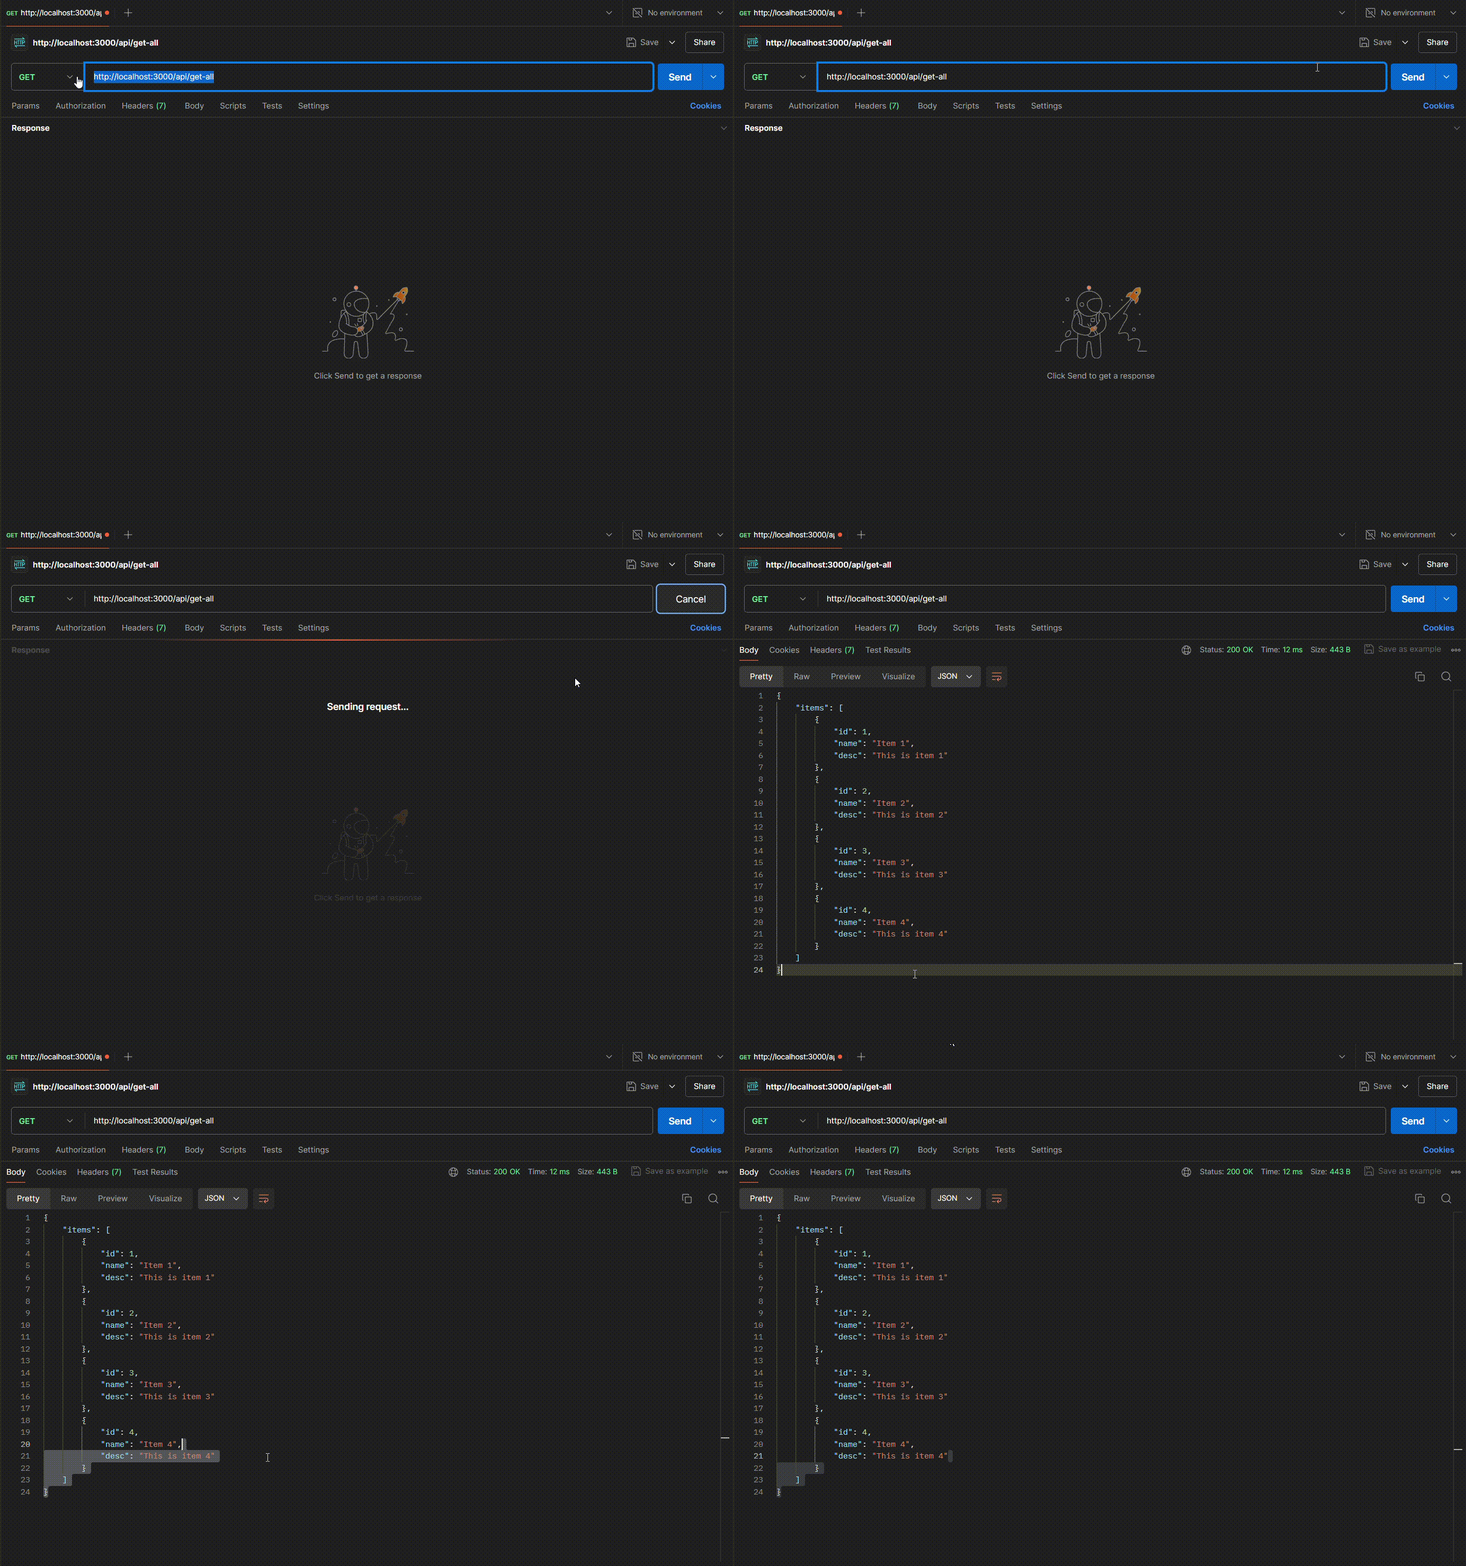
Now let's make a call to this endpoint in Postman.
- Open Postman, and create a new request, it will be a GET request by default. In the address bar, add the URL of your server and hit "send" to make the request.
- As soon as the request is completed, a response window will pop up from the bottom of the screen showing you the received response.
POST Route
We will create a POST route to add a new item to our array, add the following code to your routes.js file to do so:
1// http://localhost:3000/api/add
2router.post("/add", (req, res) => {
3  try {
4    const { id, name, desc } = req.body;
5
6    // Construct a new object to add to the array
7    const newItem = {
8      id,
9      name,
10      desc,
11    };
12
13    // Add the newly created item to the existing array
14    items.push(newItem);
15    res.status(201).json({ message: "Item added!", items });
16  } catch (error) {
17    console.log(error);
18  }
19});
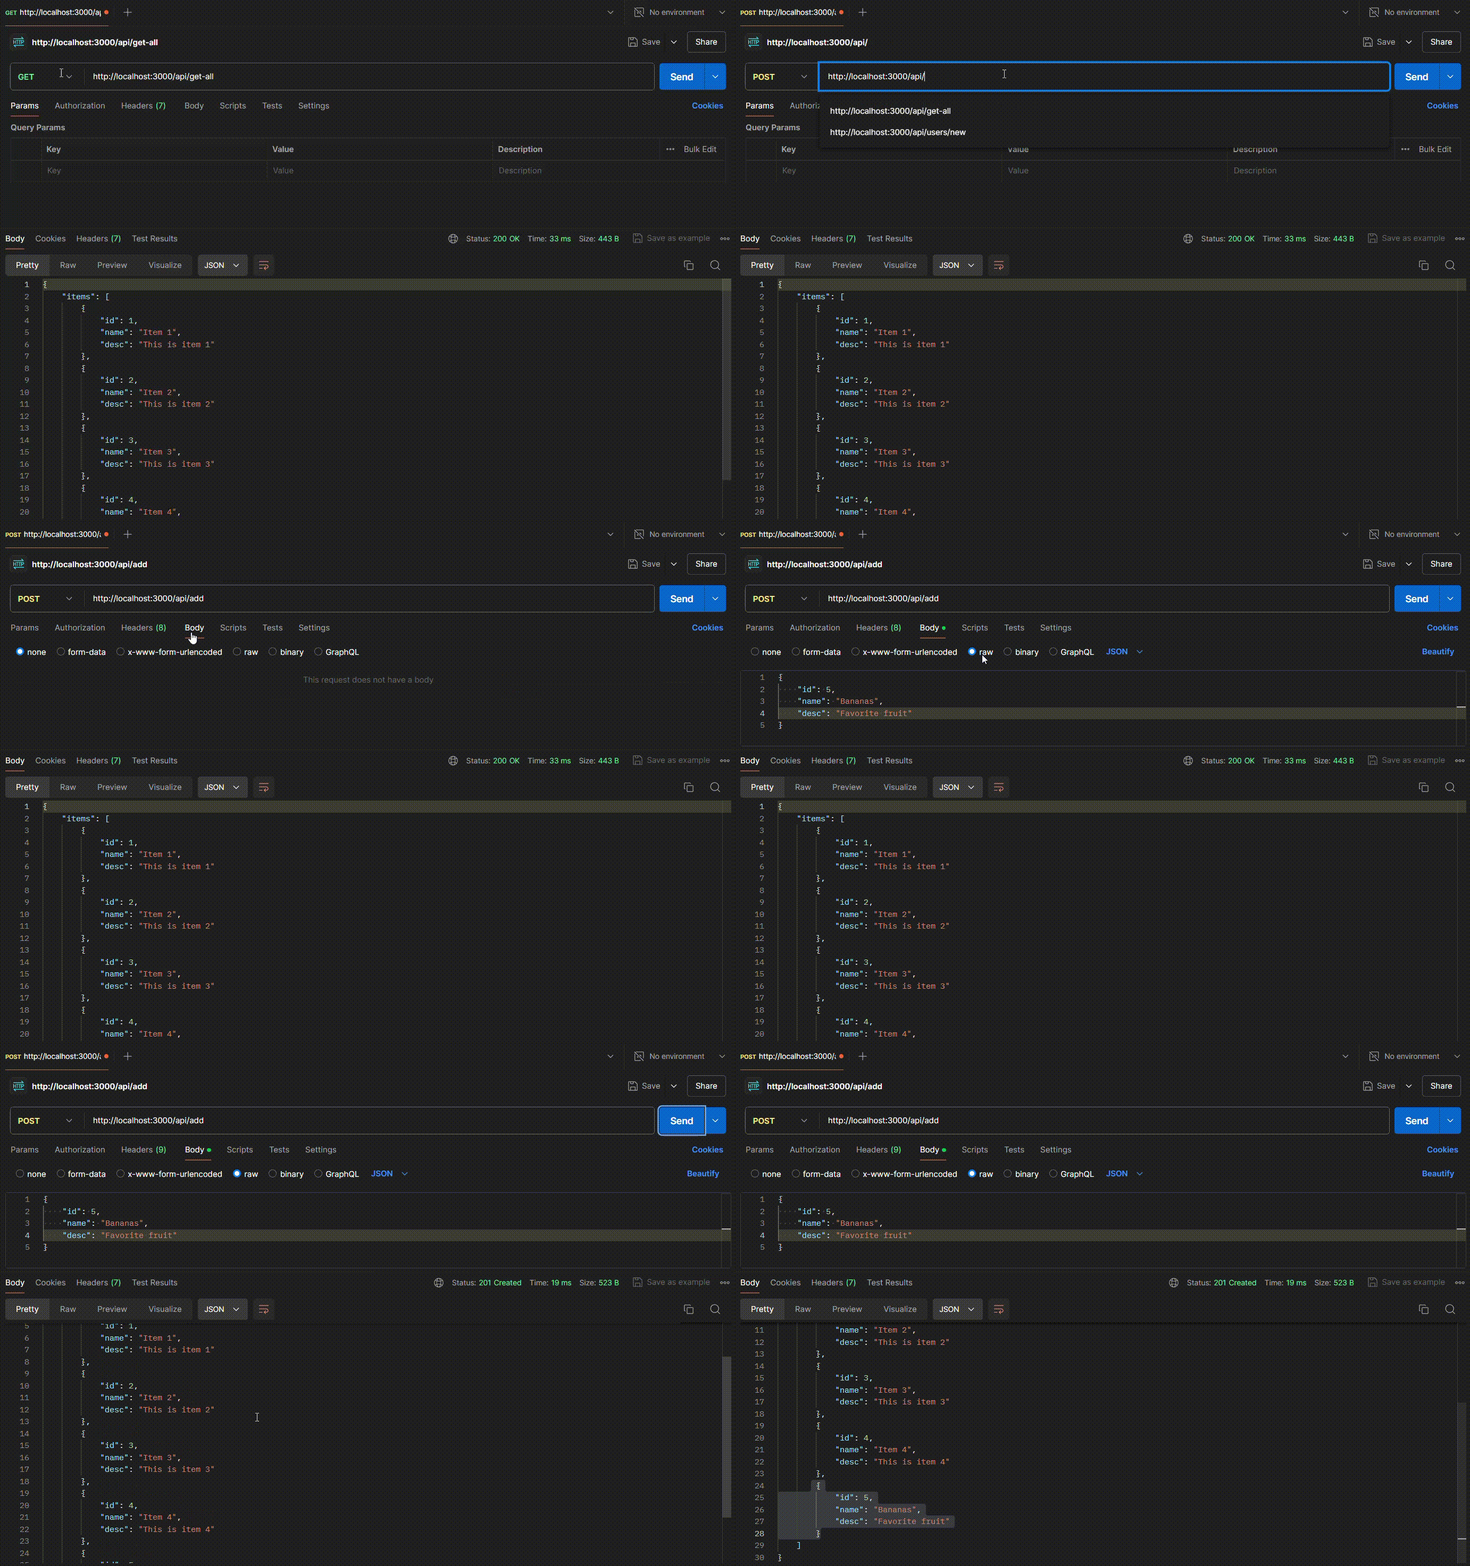
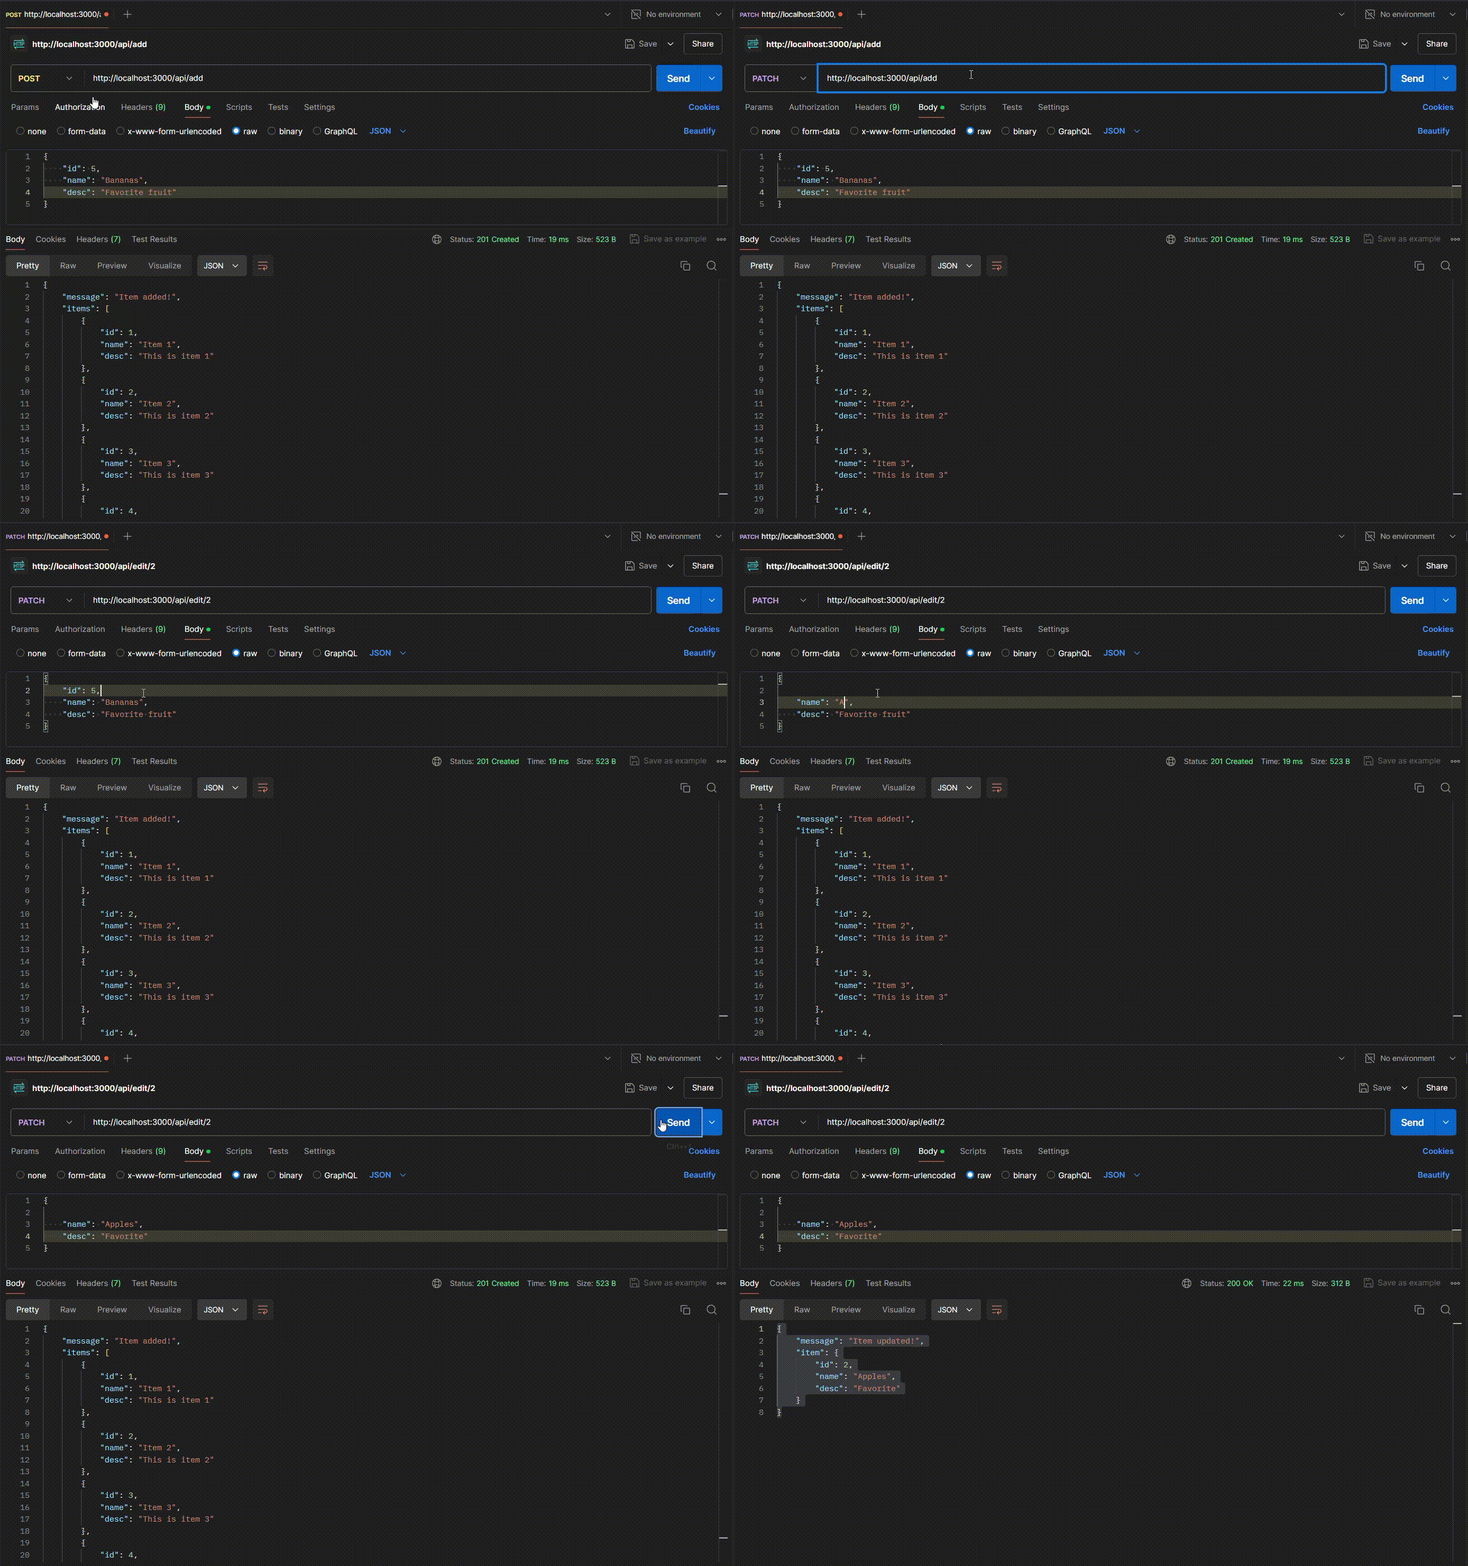
Making the request:
When you make this request, the server will parse the incoming data(req.body) and then create a new object that will then, be pushed to our array.
The resultant response object will include the newly created item at the end of the array.
PATCH Route
Although both PUT and PATCH serve the same purpose, I'll use PATCH for this one, you can choose any, it won't make much of a difference.
1// http://localhost:3000/api/edit/:id
2router.patch("/edit/:id", (req, res) => {
3  try {
4    const id = parseInt(req.params.id);
5    const updates = req.body; // the updates field could inclue either name or desc, or both
6
7    const item = items.find((item) => item.id === id);
8
9    if (item) {
10      Object.assign(item, updates); // Merge updates into the item
11      res.status(200).json({ message: "Item updated!", item });
12    } else {
13      res.status(404).json({ message: "Item not found!" });
14    }
15  } catch (error) {
16    console.log(error);
17  }
18});
In the above route handler, there a few things to understand:
- First of all, this route is different from the previous two, as it has a special "/:id" parameter. This special parameter will help us send the ID of the item we want to update.
- Using "req.params.id" we can extract the ID from the URL and then we can send it to our server for further processing.
- If the item is found, we update it and if it is not found, meaning if the ID is invalid, we return a 404 status, which means resource not found.
DELETE Route
The structure of the DELETE route handler will be similar to that of the PATCH handler, we will search for an item using it's ID and then remove it from the array.
1// http://localhost:3000/api/delete/:id
2router.delete("/delete/:id", (req, res) => {
3  try {
4    const id = parseInt(req.params.id);
5
6    const itemIndex = items.findIndex((item) => item.id === id);
7
8    if (itemIndex !== -1) {
9      items.splice(itemIndex, 1); // Remove the item from the array
10      res.status(200).json({ message: "Item deleted!", items });
11    } else {
12      res.status(404).json({ message: "Item not found!" });
13    }
14  } catch (error) {
15    console.log(error);
16    res.status(500).json({ message: "An error occurred." });
17  }
18});
There you go! Now you can GET all the data, POST data of your own, edit it or delete it if you wish to.
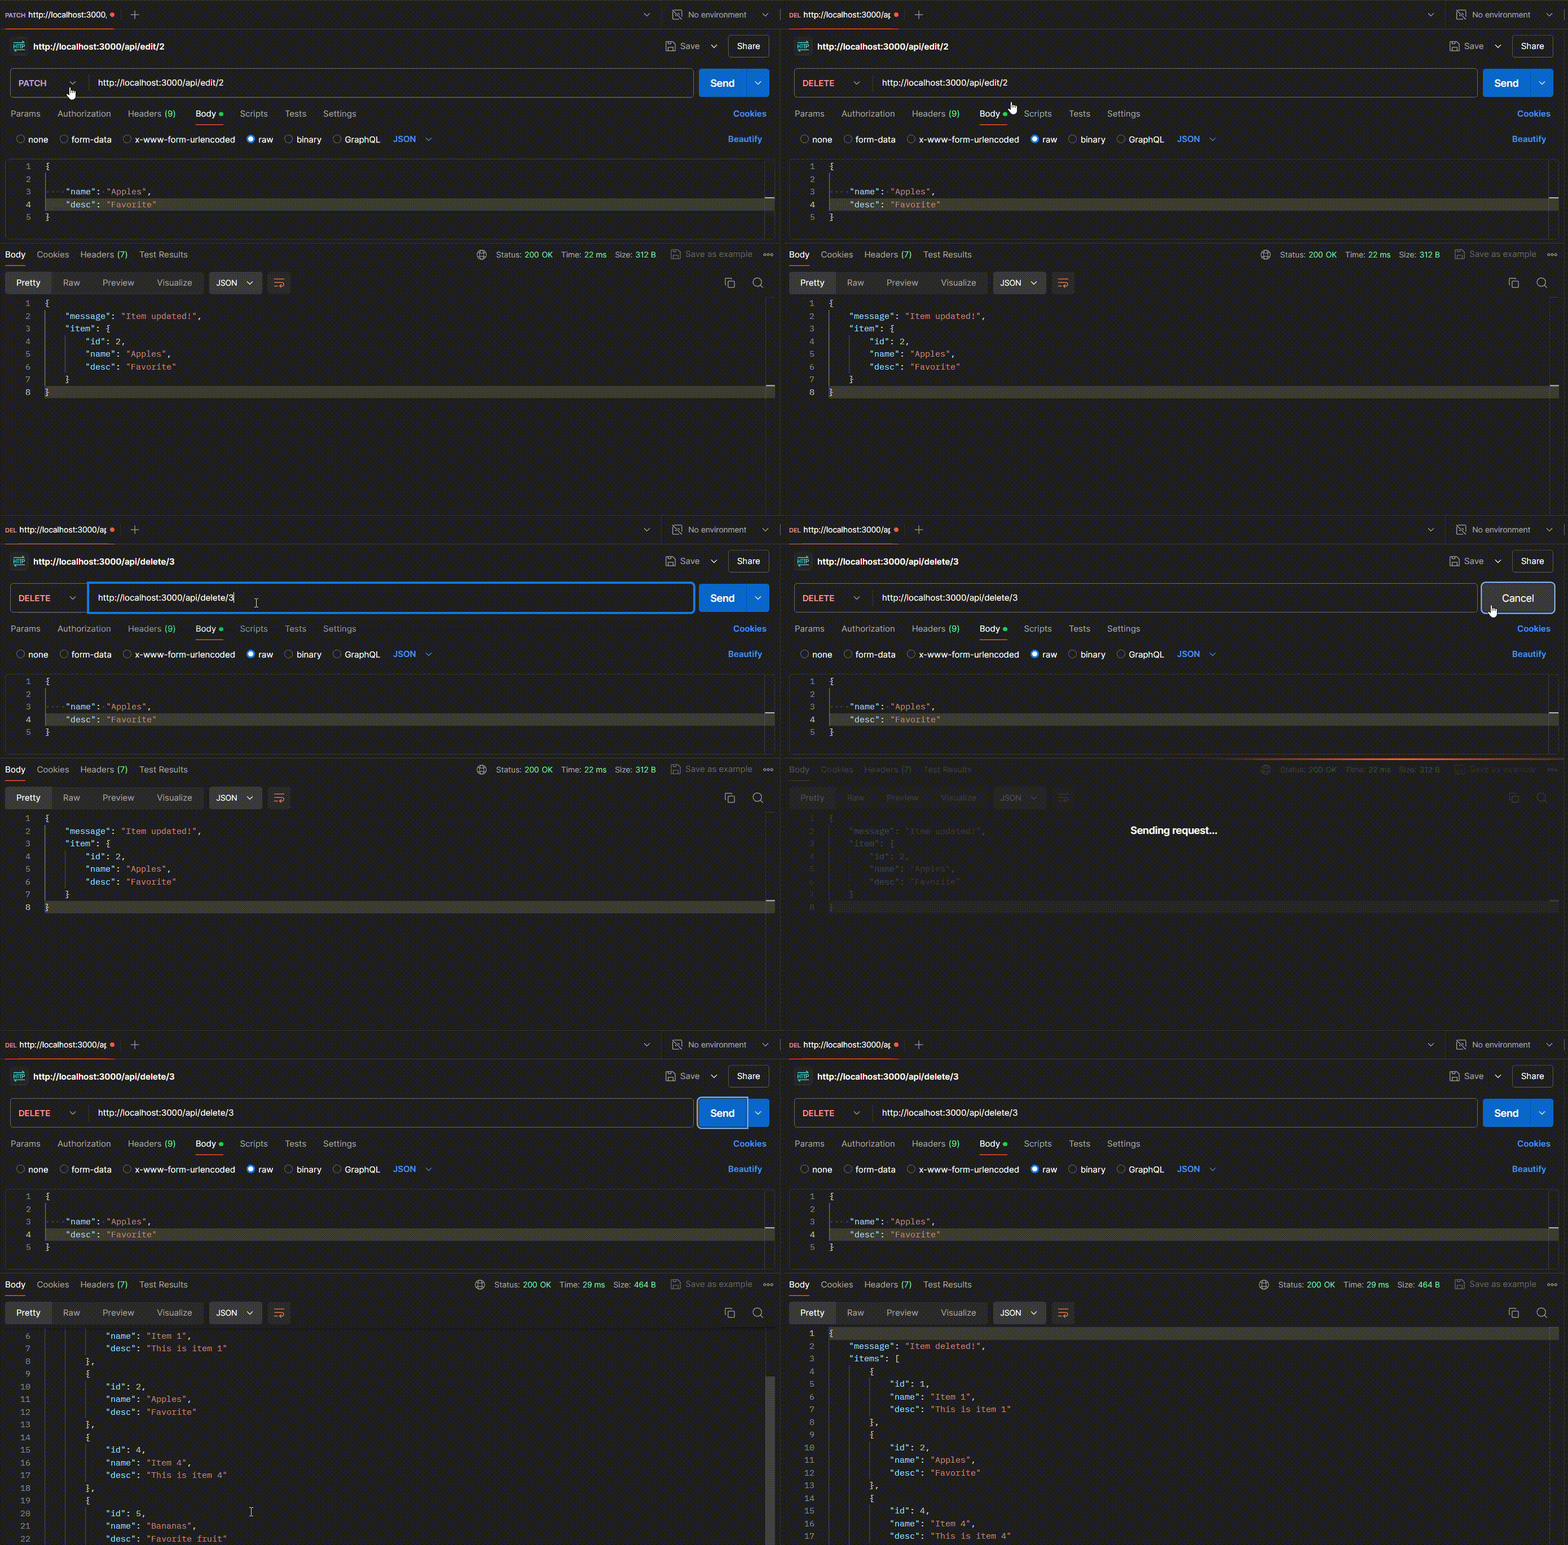
However, an important thing you should know, since the data(items array) is hard coded into the file, it will not update in real time. So if you were to update/delete any item with ID anything outside of 1-4, you will get a 404 error since the hard coded array only contains item with ID 1-4.
Conclusion
In this article, we learned about:
- What are request-response cycles?
- How does express handles req-res cycles?
- HTTP Methods(GET, POST, PUT, PATCH, DELETE)
- How can we create our own API with express
That will be all for today's blog! I hope you enjoyed it. In our next blog, we will talk about middleware and database integration in our API.
Until then keep practicing and I'll, catch you in the next one.👋